# Set up and test website chat
> Set up the website chat's greeting and appearance, set the goal it works toward, test a conversation and check the installed experience.
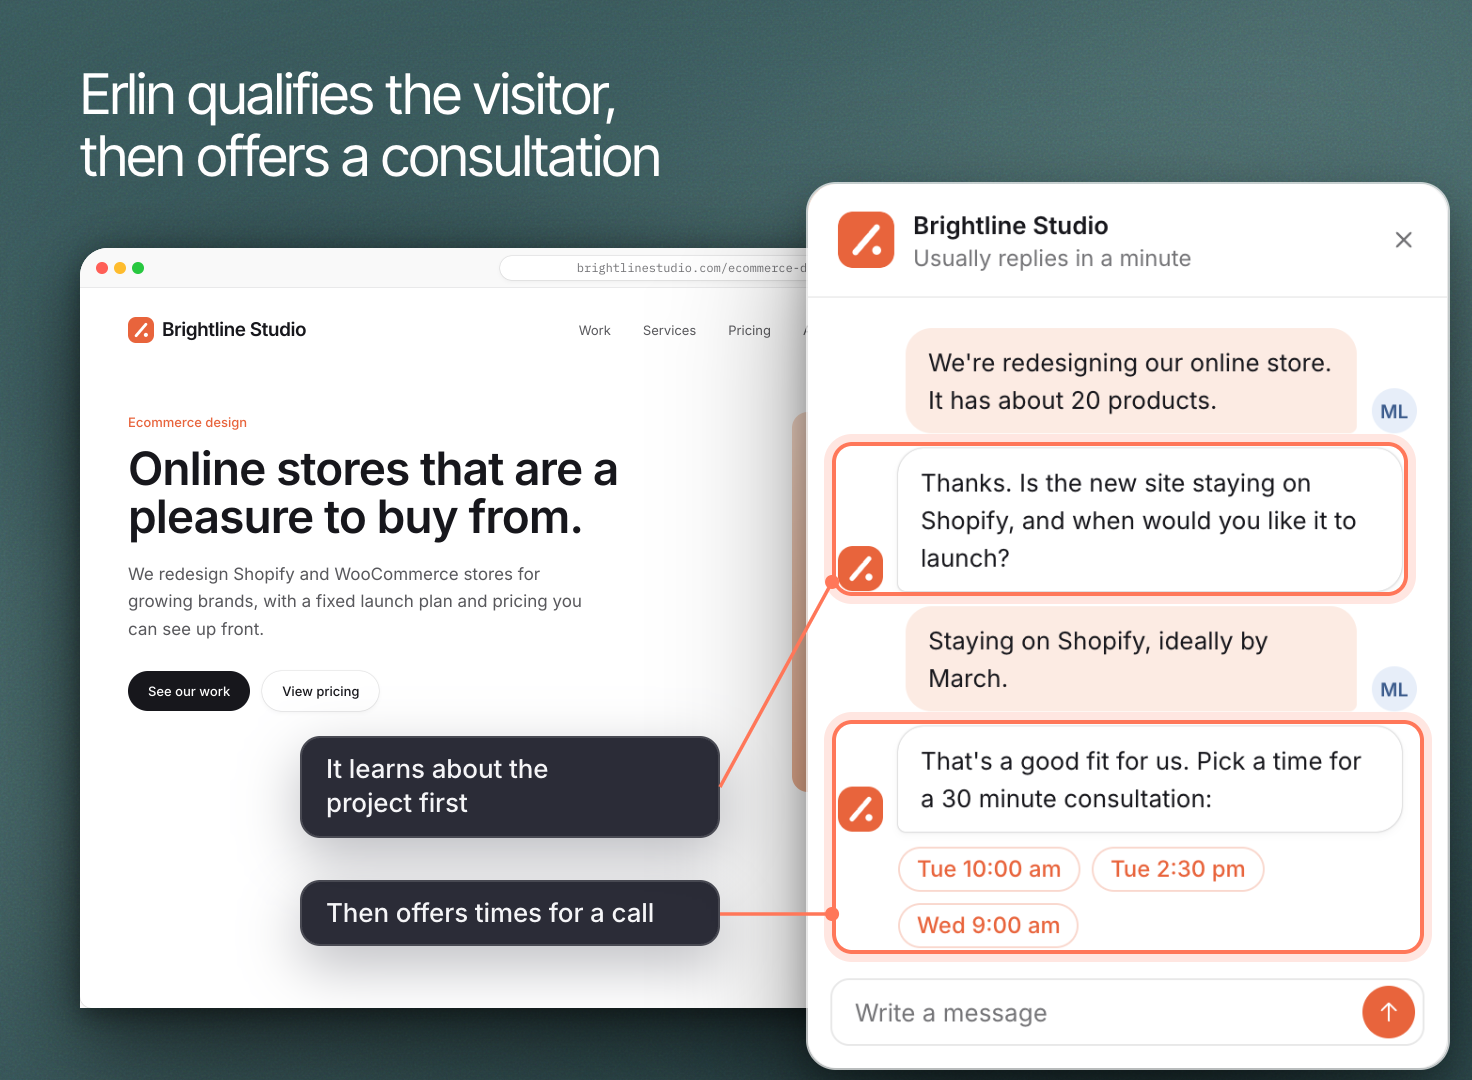 Erlin's website chat answers visitors from what Erlin knows about your brand, and qualifies them as it goes: it asks your questions, collects what your goal needs and offers your booking link to leads who qualify. Every chat becomes a lead in the [CRM](https://www.erlin.ai/docs/leads/crm).
Set it up in **Leads & Pipeline > Lead Qualification**, on the **Website chat** tab (how the chat looks) and the **Goal & rules** tab (what it works toward).
## Before you start
Review your [business knowledge](https://www.erlin.ai/docs/brand/knowledge), including your services and the information visitors usually need. The chat runs from the Erlin tag, so install the tag on your site first. See [Forms and install](https://www.erlin.ai/docs/leads/forms-and-install).
## 1. Write the first message
On the **Website chat** tab:
- **Show the chat** turns the chat on or off on your site. Off, visitors do not see it.
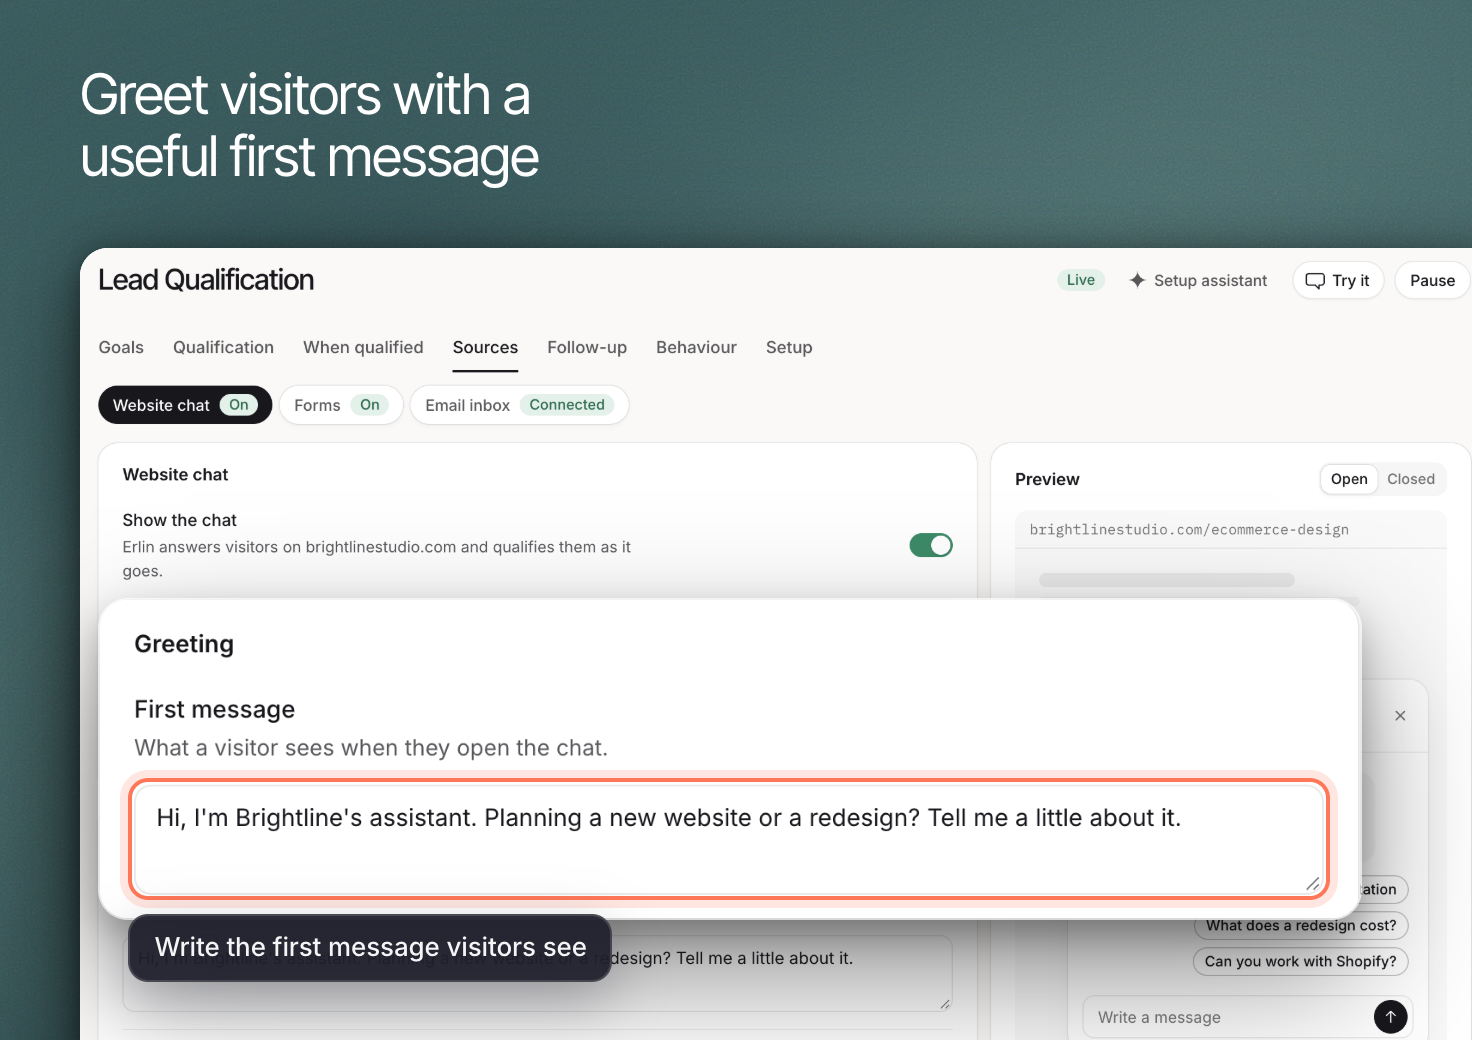
- **First message**, under **Greeting**, is what a visitor sees when they open the chat, up to 300 characters.
- **Quick replies** are up to four tap-to-send replies under the first message, 60 characters each. Erlin suggests them from your site.
Write a greeting that explains what the visitor can do. This is example copy: "Tell us what you would like to change about your website. We can help you work out the next step." Adapt it to your business and avoid promising an immediate human reply unless your team provides one.
Erlin's website chat answers visitors from what Erlin knows about your brand, and qualifies them as it goes: it asks your questions, collects what your goal needs and offers your booking link to leads who qualify. Every chat becomes a lead in the [CRM](https://www.erlin.ai/docs/leads/crm).
Set it up in **Leads & Pipeline > Lead Qualification**, on the **Website chat** tab (how the chat looks) and the **Goal & rules** tab (what it works toward).
## Before you start
Review your [business knowledge](https://www.erlin.ai/docs/brand/knowledge), including your services and the information visitors usually need. The chat runs from the Erlin tag, so install the tag on your site first. See [Forms and install](https://www.erlin.ai/docs/leads/forms-and-install).
## 1. Write the first message
On the **Website chat** tab:
- **Show the chat** turns the chat on or off on your site. Off, visitors do not see it.
- **First message**, under **Greeting**, is what a visitor sees when they open the chat, up to 300 characters.
- **Quick replies** are up to four tap-to-send replies under the first message, 60 characters each. Erlin suggests them from your site.
Write a greeting that explains what the visitor can do. This is example copy: "Tell us what you would like to change about your website. We can help you work out the next step." Adapt it to your business and avoid promising an immediate human reply unless your team provides one.
 ## 2. Match the chat to your brand
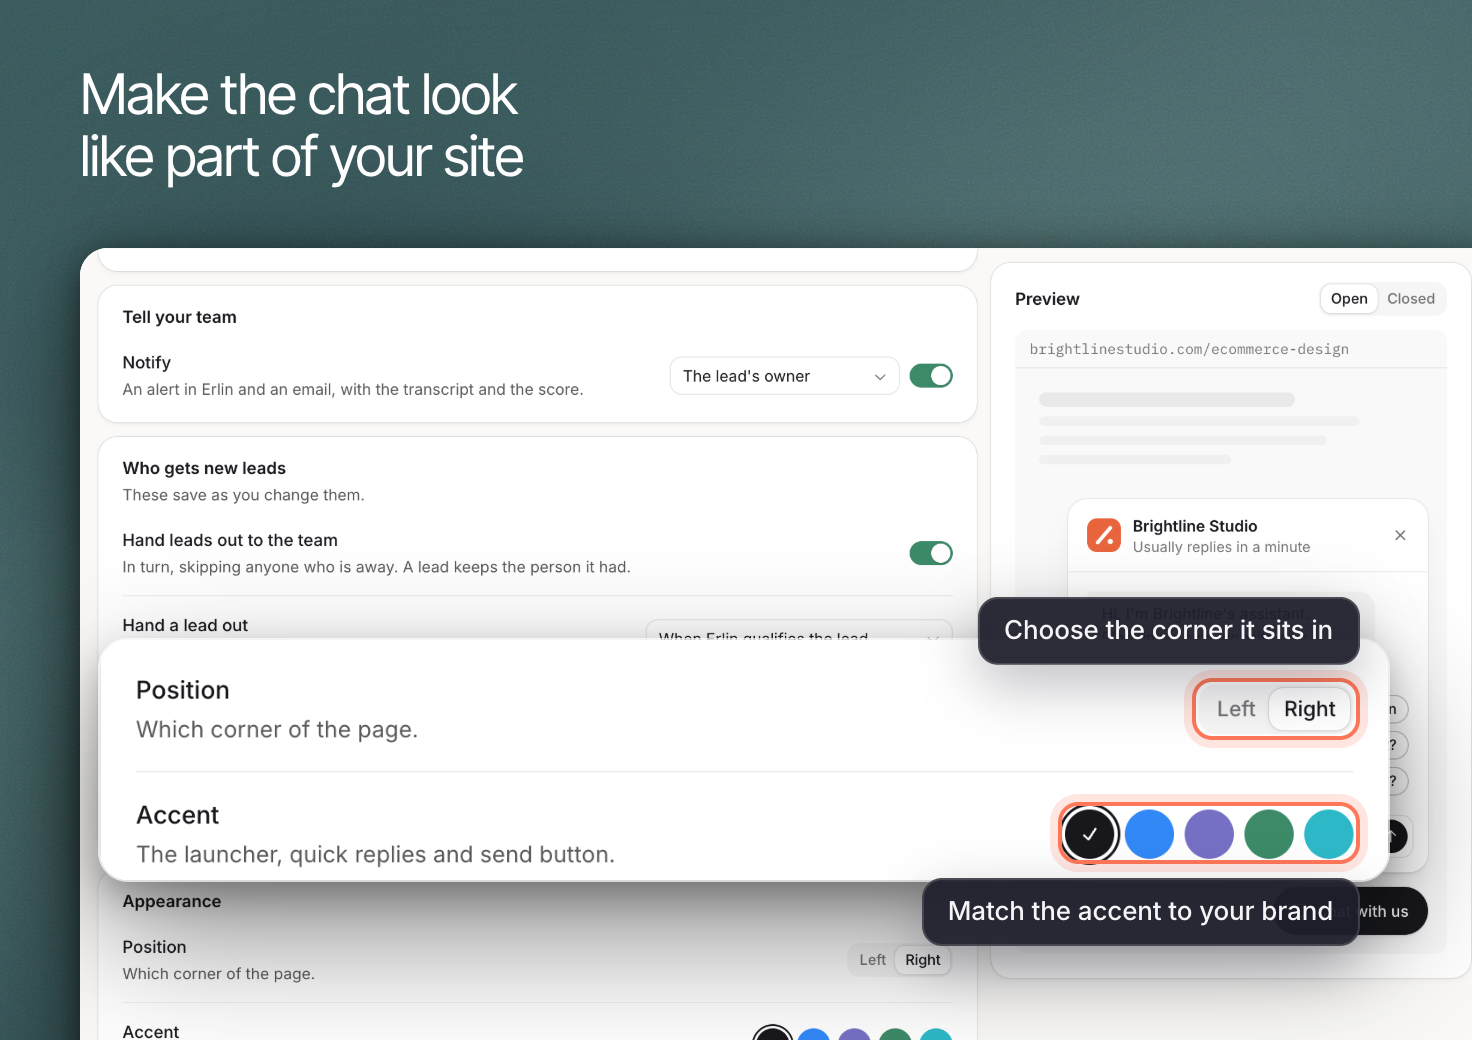
Under **Appearance**, **Accent** sets the color of the launcher, quick replies and send button. The preview on the right shows the chat open or closed. Click **Save changes** to publish. Check the chat on a small screen, and make sure the launcher does not cover an important page control.
## 2. Match the chat to your brand
Under **Appearance**, **Accent** sets the color of the launcher, quick replies and send button. The preview on the right shows the chat open or closed. Click **Save changes** to publish. Check the chat on a small screen, and make sure the launcher does not cover an important page control.
 ## 3. Set up the goal
The goal is what Erlin works toward in the chat: the rules a lead must pass, what Erlin collects and where each lead goes. On the **Goal & rules** tab, click **Set up a goal** (or **Edit goal**). Enter a **Goal name**, pick what a qualified lead does, and add the rules, checklist items and routing. Click **Save and turn on** for a new goal, or **Save goal**. To change a question's wording later, use the **Questions** tab. See [Lead Qualification](https://www.erlin.ai/docs/leads/lead-qualification).
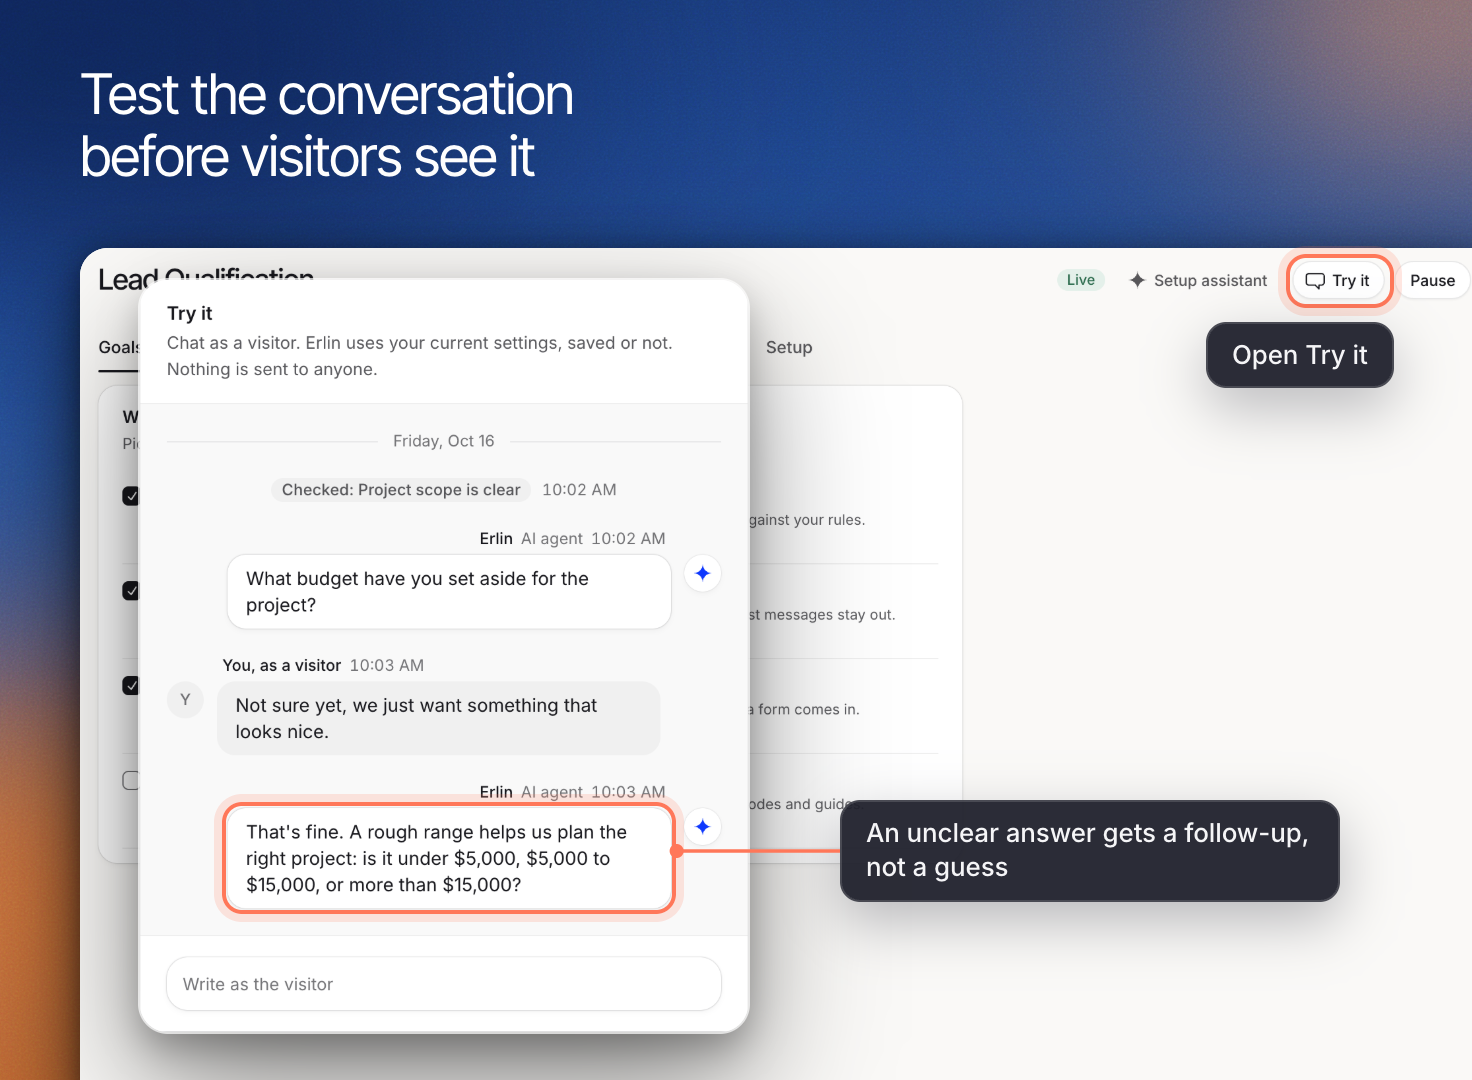
For each rule, Erlin matches the visitor's reply to one of the rule's answers. The passing answer passes the rule. Another listed answer means the lead does not qualify, and Erlin sends your message for that case word for word. An unclear reply gets the question once more, and a second unclear reply flags the lead for your review. An unclear reply never disqualifies anyone. If a visitor declines to answer, the goal ends as declined.
A visitor may answer a question before Erlin asks it. Test whether the conversation uses information already provided rather than repeating questions.
## 4. Check the next step
Under **When a lead qualifies** on the **Goal & rules** tab, check that the outcome is the one you want: **Book a consultation**, **Collect contact details** or **Hand to the team**. For a goal that books, the **Booking link** row shows the link Erlin offers. See [Booking](https://www.erlin.ai/docs/leads/booking).
## 5. Test before enabling chat for visitors
Save your changes, then click **Test the agent** at the top of Lead Qualification and chat as a visitor. Nothing is saved and no lead is created. The test uses your saved goal, so save first. Click **Start over** for a fresh chat. Test:
- A visitor with a request you can serve.
- A visitor who asks an ordinary question about your business.
- A visitor who provides incomplete information.
- A visitor who asks for a person.
You can take over a live chat from the lead's **Chat** tab in the CRM. Erlin stops answering until you hand it back. To pause qualifying altogether, switch the goal to **Goal paused** at the top of Lead Qualification. New leads then wait in the CRM for your team.
## 3. Set up the goal
The goal is what Erlin works toward in the chat: the rules a lead must pass, what Erlin collects and where each lead goes. On the **Goal & rules** tab, click **Set up a goal** (or **Edit goal**). Enter a **Goal name**, pick what a qualified lead does, and add the rules, checklist items and routing. Click **Save and turn on** for a new goal, or **Save goal**. To change a question's wording later, use the **Questions** tab. See [Lead Qualification](https://www.erlin.ai/docs/leads/lead-qualification).
For each rule, Erlin matches the visitor's reply to one of the rule's answers. The passing answer passes the rule. Another listed answer means the lead does not qualify, and Erlin sends your message for that case word for word. An unclear reply gets the question once more, and a second unclear reply flags the lead for your review. An unclear reply never disqualifies anyone. If a visitor declines to answer, the goal ends as declined.
A visitor may answer a question before Erlin asks it. Test whether the conversation uses information already provided rather than repeating questions.
## 4. Check the next step
Under **When a lead qualifies** on the **Goal & rules** tab, check that the outcome is the one you want: **Book a consultation**, **Collect contact details** or **Hand to the team**. For a goal that books, the **Booking link** row shows the link Erlin offers. See [Booking](https://www.erlin.ai/docs/leads/booking).
## 5. Test before enabling chat for visitors
Save your changes, then click **Test the agent** at the top of Lead Qualification and chat as a visitor. Nothing is saved and no lead is created. The test uses your saved goal, so save first. Click **Start over** for a fresh chat. Test:
- A visitor with a request you can serve.
- A visitor who asks an ordinary question about your business.
- A visitor who provides incomplete information.
- A visitor who asks for a person.
You can take over a live chat from the lead's **Chat** tab in the CRM. Erlin stops answering until you hand it back. To pause qualifying altogether, switch the goal to **Goal paused** at the top of Lead Qualification. New leads then wait in the CRM for your team.
 ## 6. Check the installed experience
Open your website as a visitor and confirm that the launcher, greeting and quick replies appear as intended, on a page where people commonly inquire and on mobile. If the chat does not appear, check that **Show the chat** is on and that the **Install** tab shows **Detected**. If answers are inaccurate, correct the relevant [business knowledge](https://www.erlin.ai/docs/brand/knowledge) and test again.
Visitors can attach files in the chat: PDF, Word (.docx), PNG, JPG or WebP, up to 10 MB each and five per conversation. Files land in the lead's **Files** tab in the CRM, and Erlin reads documents and shows a summary on the lead. Use the [CRM](https://www.erlin.ai/docs/leads/crm) to review conversations, and refine questions when real inquiries reveal a gap.
## 6. Check the installed experience
Open your website as a visitor and confirm that the launcher, greeting and quick replies appear as intended, on a page where people commonly inquire and on mobile. If the chat does not appear, check that **Show the chat** is on and that the **Install** tab shows **Detected**. If answers are inaccurate, correct the relevant [business knowledge](https://www.erlin.ai/docs/brand/knowledge) and test again.
Visitors can attach files in the chat: PDF, Word (.docx), PNG, JPG or WebP, up to 10 MB each and five per conversation. Files land in the lead's **Files** tab in the CRM, and Erlin reads documents and shows a summary on the lead. Use the [CRM](https://www.erlin.ai/docs/leads/crm) to review conversations, and refine questions when real inquiries reveal a gap.