# Review, edit and publish content
> The content editor is where you review a draft, ask Erlin for edits you accept or dismiss, and publish to WordPress.
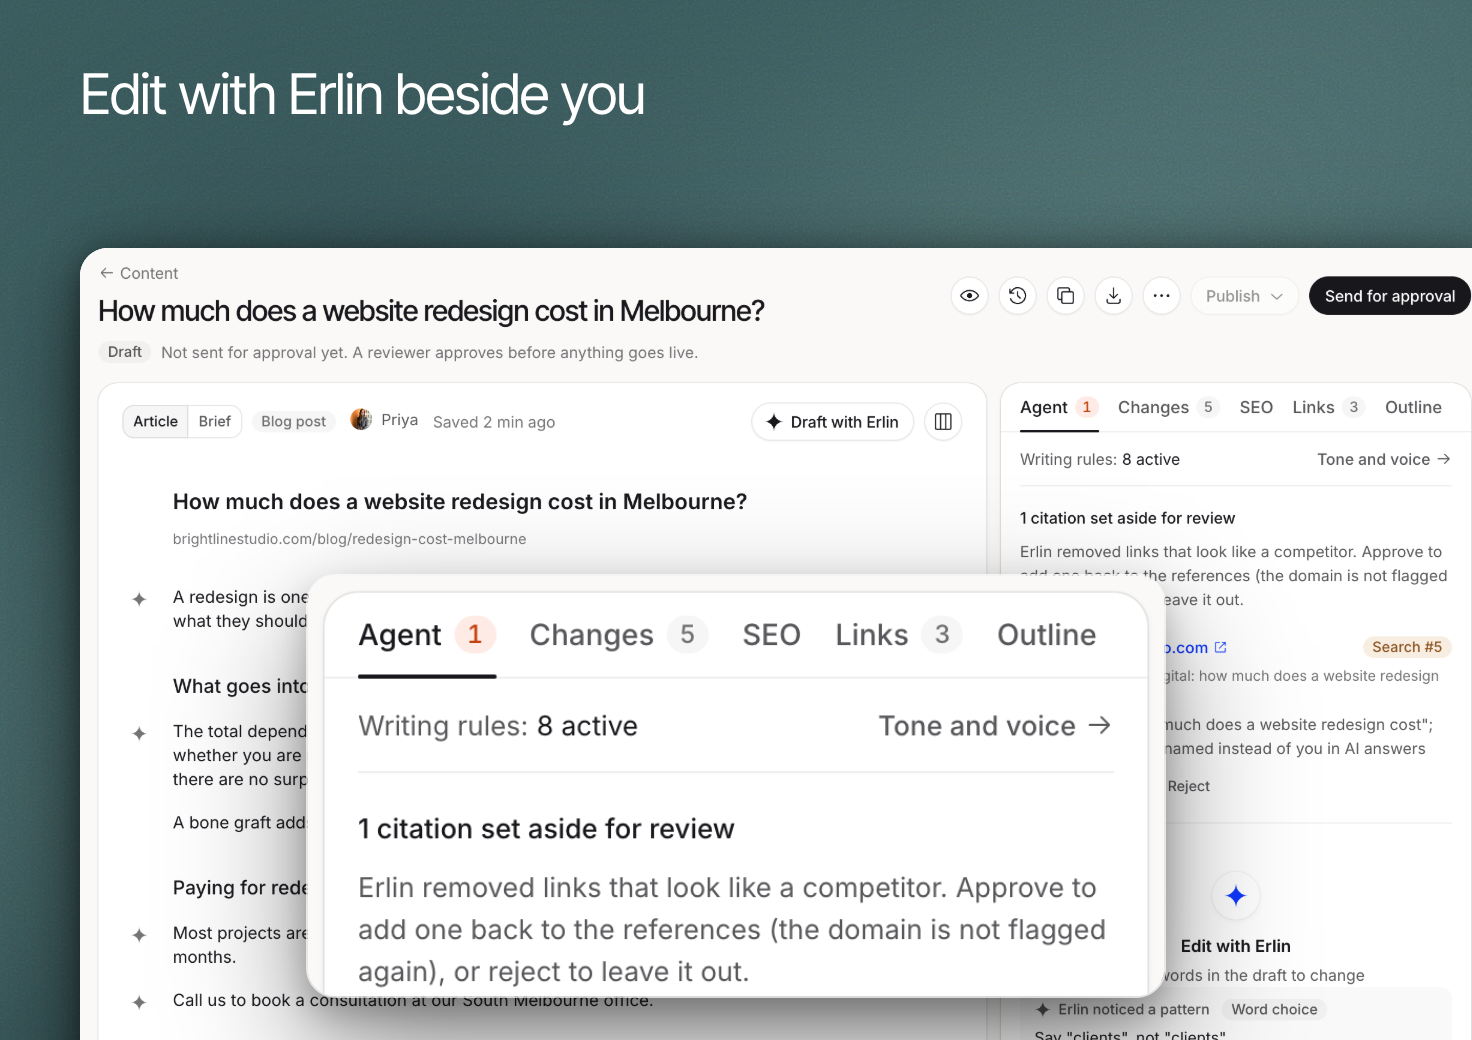 Use the content editor to turn a draft into a piece your team is ready to publish. Review the argument, facts and links before choosing a destination.
Open an article from the [Content library](https://www.erlin.ai/docs/content/library) or continue from a newly written brief.
## 1. Read the draft as a reader
Check that the introduction answers the main question and that each section adds something useful. Use the **Article | Brief** switch to read the brief it was written from, **Outline** to inspect the order and **Links** to review internal links and citations.
A writing score is a review aid, not proof that a claim is true. Check prices, capabilities and customer statements against reliable information.
## 2. Review suggested edits
Type a specific change in **Agent**. The edit waits in **Changes**, and nothing changes until you click **Accept** or **Dismiss**. Review the revised passage in context.
## 3. Check SEO, links and outline
Use **SEO** for the SEO and AEO score and its checks, with **Fix all with Erlin** to send failing checks to **Agent**. **Links** lists pages from your sitemap and the citations in the text. **Outline** lists the headings. Use **Undo** next to **Last change** to reverse the most recent applied edit.
Each article has 10 AI edits. An edit costs 10 credits per 300 words it adds, rounded up, and only net added words count, so an edit that shortens the article costs 0. With your own API key, edits cost 0 credits. If writing fails, the editor offers **Write it again**.
To change the text yourself, click **Edit** to work in Markdown, then **Save**. Use **Copy article as Markdown** or **Export** to take the piece elsewhere.
## 4. Publish to WordPress
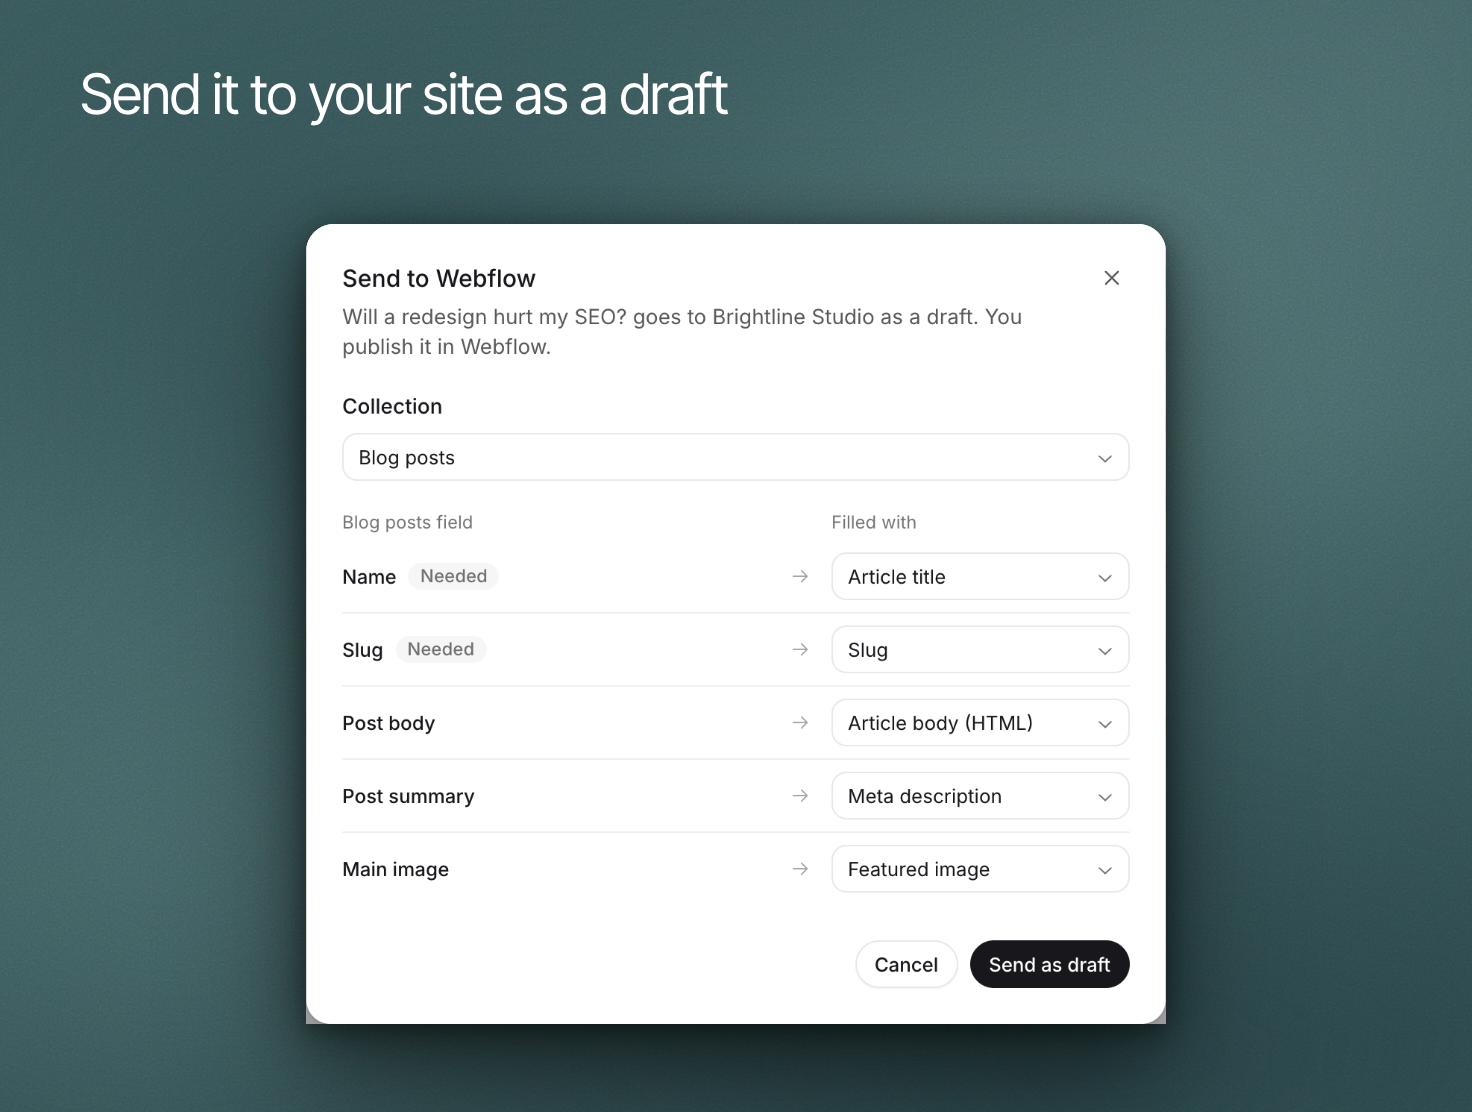
Connect WordPress first. See [WordPress](https://www.erlin.ai/docs/integrations/wordpress). Click **Publish** in the header and pick:
- **WordPress**: goes live on your site.
- **Save as a WordPress draft**: goes to WordPress as a draft you can check there first.
- **Publish with options**: set the **Author**, **Categories**, **Tags**, **Post URL**, the **Meta title** and **Meta description** when your site uses Yoast or RankMath, and the **Canonical URL**, then publish or save as a draft.
With the Erlin WordPress plugin connected, the Publish menu sends the article through the plugin, and it imports within a minute or so. If no site is connected, the dialog offers **Go to Integrations**.
Once an article is live, the header button reads **Update**, with **View the live page** in its menu. Updating replaces the post, so edits made in WordPress since the last publish are lost.
Use the content editor to turn a draft into a piece your team is ready to publish. Review the argument, facts and links before choosing a destination.
Open an article from the [Content library](https://www.erlin.ai/docs/content/library) or continue from a newly written brief.
## 1. Read the draft as a reader
Check that the introduction answers the main question and that each section adds something useful. Use the **Article | Brief** switch to read the brief it was written from, **Outline** to inspect the order and **Links** to review internal links and citations.
A writing score is a review aid, not proof that a claim is true. Check prices, capabilities and customer statements against reliable information.
## 2. Review suggested edits
Type a specific change in **Agent**. The edit waits in **Changes**, and nothing changes until you click **Accept** or **Dismiss**. Review the revised passage in context.
## 3. Check SEO, links and outline
Use **SEO** for the SEO and AEO score and its checks, with **Fix all with Erlin** to send failing checks to **Agent**. **Links** lists pages from your sitemap and the citations in the text. **Outline** lists the headings. Use **Undo** next to **Last change** to reverse the most recent applied edit.
Each article has 10 AI edits. An edit costs 10 credits per 300 words it adds, rounded up, and only net added words count, so an edit that shortens the article costs 0. With your own API key, edits cost 0 credits. If writing fails, the editor offers **Write it again**.
To change the text yourself, click **Edit** to work in Markdown, then **Save**. Use **Copy article as Markdown** or **Export** to take the piece elsewhere.
## 4. Publish to WordPress
Connect WordPress first. See [WordPress](https://www.erlin.ai/docs/integrations/wordpress). Click **Publish** in the header and pick:
- **WordPress**: goes live on your site.
- **Save as a WordPress draft**: goes to WordPress as a draft you can check there first.
- **Publish with options**: set the **Author**, **Categories**, **Tags**, **Post URL**, the **Meta title** and **Meta description** when your site uses Yoast or RankMath, and the **Canonical URL**, then publish or save as a draft.
With the Erlin WordPress plugin connected, the Publish menu sends the article through the plugin, and it imports within a minute or so. If no site is connected, the dialog offers **Go to Integrations**.
Once an article is live, the header button reads **Update**, with **View the live page** in its menu. Updating replaces the post, so edits made in WordPress since the last publish are lost.
 ## 5. Check the result
After publishing, open the destination page and review headings, links, images and important factual passages. A successful transfer does not replace checking the rendered page.
Use **Export** (Markdown, HTML or Word) if your team finishes the piece elsewhere. **More > Delete article** removes it after you confirm, and a page already on WordPress stays there. Continue with [WordPress](https://www.erlin.ai/docs/integrations/wordpress) or [Content optimization](https://www.erlin.ai/docs/content/content-optimization) for an existing-page update.
## 5. Check the result
After publishing, open the destination page and review headings, links, images and important factual passages. A successful transfer does not replace checking the rendered page.
Use **Export** (Markdown, HTML or Word) if your team finishes the piece elsewhere. **More > Delete article** removes it after you confirm, and a page already on WordPress stays there. Continue with [WordPress](https://www.erlin.ai/docs/integrations/wordpress) or [Content optimization](https://www.erlin.ai/docs/content/content-optimization) for an existing-page update.